Saturday, October 29, 2016

Ribs on a Kettle

Ribs


I shared some ribs with a friend recently and he told me he really enjoyed them. I said that he could do that himself and wouldn't have to wait for me to decide to share again. He thought it involved too much skill and technique. I disagree, but I've been doing this for years. The purpose of this post is to describe my process so any reasonably competent cook can follow it. There is really a lot of margin in the process and I'll try to identify any points I think are critical.

Equipment

I really love my Weber Smokey Mountains. They are awesome smokers but they are expensive and you really have to be dedicated to spend $300 on one. (If you decide to go that way, I recommend the middle size 18 1/2" as the most useful.) I just checked Craigslist and there are two for sale. That compares to a couple dozen kettles.

The Kettle

The kettle is the original Weber (slightly modified from George Steven's original design.) It remains the most versatile cooker. I prefer it for ribs because grate area is what counts. I like to use my 26" kettle for ribs but the 22" will do the job. I see them on Craigslist for $15 and up. (You can recognize the 22" because it has the lid vents in line with the handle instead of to the side of the handle.)

Charcoal

For smoking on the kettle I use KBB. That's code for Kingsford Blue Bag. Plain old charcoal. Not matchlight! (Unless you like the taste of petroleum accelerants.) KBB provides a consistent burn. Stick with that unless you are confident in another brand.

Smoking wood

This is not required but I think it adds a nice flavor. It can also add too much flavor. A couple pieces of hickory, maple, apple and/or oak will do. They can be about the same size as the briquettes. wood chips work too but I prefer chunks. I don't bother to soak the wood in water. Wood is waterproof. They make boats out of wood.
If you have no smoking wood handy, don't worry. The ribs will still be good with just plain charcoal. (And less likely to be oversmoked.)

Fire

No charcoal lighter fluid! I use paper in a Weber charcoal chimney. (Don't cheap out and buy a knock off that won't work as well.) I use the small Weber chimney for this because I only need to start a big handful of charcoal. 
An alternative is a big weed burner. I'm talking with the kind with a 4" burner tip and hose that attaches to a 20 lb. propane tank. You listen to the combustion roar when lit and you know it's going to light charcoal! You can also use an ordinary propane torch but it is not nearly as dramatic.

Meat

I think back ribs are going to be the easiest. You may also run across baby back ribs but those are going to be pricey and not really necessary. The whole point of BBQ is to take tough and otherwise useless pieces of meat and make them good. I find spare ribs a little tougher (pun intended) to get right. Country ribs are just a pork butt sliced up. I don't recommend them. (You can do a whole butt on the kettle but that's something entirely different.) I find nice meaty back ribs at Sam's Club. They come 3 to a Cryovac pack which works well on my 26" kettle. For a 22" kettle two racks of back ribs are enough.

Rub

I mix a bunch-O-spices and grind them in a retired coffee grinder. (The one shaped like an oval beer can.) You could just mix ground spices and be just as well off. Here's my mix.

        2 Tbsp black pepper corns
        2 Tbsp whole dried Rosemary
        1 Tbsp sea salt
        1 Tbsp whole Coriander
        1/2 Tbsp whole Cumin
        1 Tbsp whole Mustard
        Grind up dry spices
        1/2 tsp cayenne

Some times I add some Ancho chili for a more Southwest flavor. Go easy on the cayenne if you don't like the heat. Add/subtract to your preference. This is not a lot of cayenne because I cook for our grandchildren. I get a kick out of seeing the youngest in his high chair with a rib in each fist. :D Seasoning is one of those areas where you can be flexible and experiment. I did some testing with a variety of commercial rubs (which are often heavy on sugar and salt) against my rub. I left some ribs unseasoned. They were all good, even the ones with no seasoning (though I would recommend at least some pepper and a little salt at a minimum.)

Sauce

I don't sauce the ribs in the cooker. Some times I sauce them a little when I reheat them. You can sauce them toward the end of the smoke if you want. I like Sweet Baby Ray's plain sauce but there are many other good sauces. Of course a little spritz of Louisiana Hot sauce or Tabasco at the table is good if you like a little more heat.

Process

Prep the ribs

First thing I do is unwrap the ribs. Flip them over and try to peel the membrane off the back. Stick something like a bamboo skewer or spoon handle under the edge to get it started and grab it with some paper towel to get a grip and peel it off. If it doesn't come off easily, just leave it in place.
Apply the rub to both sides of the ribs. The recipe above is about right for three racks of back ribs or two of spares. They come out kind of like herb crusted ribs. I like that. If you don't, use less rub. It's not critical. The ribs sit with the rub on them while I get the fire going.

Fire Lay

I use a charcoal arrangement that is called the snake. I put a wide row of charcoal about 2/3 of the way around the charcoal grate. I do this about 4-5 briquettes or so wide. Think of that as three briquettes next to each other on the bottom and two set on top of them. I used to carefully arrange them but lately have gotten too lazy to do that. They still burn. The wider the 'snake' the hotter it will burn. Don't worry if you don't get it exact. Ribs tolerate a range of cooking temperatures. 200° F to 375° F will work and just result in different cooking time. Add a half dozen chunks of smoking wood spaced along the back of the snake and the fire is set. I also put a foil pan on the charcoal grate to catch some of the grease that will come off the ribs. You can make a tray with several layers of foil.
Light the charcoal at one end. Either light 6-8 in a chimney or aim your flame thower at one end of the snake for a half minute. The point is to start the fire at one end of the snake, not to get all of the charcoal lit. This controls temperature by limiting how much fuel burns at one time.
Open all vents completely to start. Closer to the end of the cook when the meat is hot and more of the charcoal is burning, you can close the lid vent a little to moderate temperatures. If your kettle has a lid thermometer, look for a temperature from 250-350° F. The snake will normally run at the lower end of that range. Here's a double snake that will run a little hotter.


Meat on!

My favorite part. Wait... meat off is my favorite, this is my second favorite. Arrange the racks on the grate with the end with the thickest meat toward the lit charcoal. If space is tight you might have to overlap racks but understand they will probably take a little longer to cook. When I do that I also rearrange them every hour or two to get more even cooking. Some times I flip them over for a bit too. I start ribs with the bones arched up (membrane side down.)
Put the lid on and orient the vent opposite the lit charcoal.

Cook

Resist the temptation to open the cooker and peek. It doesn't help them cook. Check after an hour or two and perhaps every hour after. When the ribs are near done, you might want to check every half hour or 20 minutes. There are strategies that involve wrapping the ribs in foil but I do not do that. Ribs steam in the foil and I want mine smoked.

When are they done?

If not cooked long enough, the meat will be tough but still tasty. If cooked too long, they may be falling off the bone. The ribs will usually pull back on the bones about 1/2" before they are done. At lower cooking temperature (below about 225° F) they may not pull back. Pick the rack up at one end with tongs and they should be somewhat floppy when done. If you get them off too soon and find them tough, stick them in the oven at 275° until done. The smoked flavor is there and will not evaporate in the oven.
They should be done in about 5 hours. It will vary depending on cooker temperature.

Do your homework

Take notes. Record what you liked, what worked well and most important, what you would do next time to make better ribs. If they don't come out perfect the first time, don't give up. Just do better. That is actually the primary purpose of this blog. I used to record in detail all of my cooks so I could reflect and do better next time. I recommend you do something similar.

Postscript

The first thing I ever cooked on a Weber kettle was back ribs. They came out so good I remember them to this day, over 4 decades later. I got good results by following the instructions that came with the cooker. You could do that too. I'm sure Weber publishes that information on line.

Enjoy!

Saturday, July 5, 2014

Independence Day Brisket

Only a day late? Maybe TdF kickoff brisket. ;) Got a 14.75 lb packer from Sam's.

Weather was warm and sunny holding at about 75°F. Wind is light to moderate at about 12 mph. Towards the end of the cook a light drizzle began, but not enough to cool the cooker.

KISS - salt and pepper rub. I cut the brisket more or less in half to fit the 18 WSM.

This cook is going on the 18 WSM fired mostly with Stubb's briquettes and mostly oak with some hickory for smoking wood. Should throw a piece of mesquite in there as well. Using both ET-73 and ET-732 remote thermometers so I can get readings from both pieces of meat. One is much thicker than the other. A not over full charcoal ring kept the temperature between 275°F and 310°F for over ten hours (with no fiddling except opening an additional bottom vent when the brisket came off.)

timetemp comment
11:15 AM

Lit cooker closed up - wait to come to temp.
11:35
With cooker temps approaching 300° F (only one bottom vent wide open) time to put the meat on! (Bigger piece up top.)
12:55 PM270°/277°/138°/75° (lid/grate/lower/upper)
1:59265°/275°/167°/111°Threw on a piece of mesquite.
3:23265°/275°/178°/153°Coming along nice!
3:50
With the bottom (smaller) piece hitting 180° I opened the cooker and wrapped it in white butcher paper.
5:35275°/307°/207°/191°I think I'll pull the small piece and wrap the big piece.
6:25320°/295°/.../202°
7:20300°/.../.../212°Bigger piece off - CI grate on and now for some bacon.


7:42250°/275°
(lid/grate)
Stirred the coals a bit.
8:00
Put some butcher paper on the bottom rack and laid out the rest of the bacon.
8:30280°/300°Bacon nearly done on the top rack (CI) bottom needs a little more to go.
9:00285°/305°Bacon on top done - on the bottom - not so much. Peeled off paper as best as I could and left on the top grate to crisp.
9:30
Rest of bacon off.

About three hours into the cook - looking good so far.


Rested and sliced and ready to eat! A slice will support its own weight but pulls apart with a little more tension. And is moist. And tastes marvelous!


Possibly my best brisket so far. 

I needn't do anything differently with the brisket next time. Perhaps serve with some fresh grated horseradish.

Bacon on the cast iron grate works well and takes advantage of the lingering heat from the charcoal. The bacon on the paper - not so good. Moisture puddled up and it stuck badly to the paper.

Monday, March 17, 2014

Happy St. Paddy's Day!

Or Happy St. Patrick's Day (But never St. Patty's Day!) I headed to the store to see if they had corned beef brisket on sale. Marianos had near 9 lb. corned beef flats for $2.99/lb. I bought two to smoke. They should freeze well. :D

Weather is still late winter clinging. About 26°F at the start of the cook and climbing rapidly toward an expected high in the mid 30s. The sky is clear and thankfully wind is light

I soaked the briskets in a big pot of water for about an hour before laying them out on the full sheet to apply the rub. They should really soak overnight to leach the salt but I did not want to wait for another day. Hopefully they will not be too salty. For rub I started with the little spice packets that came with the briskets. They look like mostly mustard with some anise and maybe coriander. Some were wet so I stuck them in the oven (spread on a plate) to dry and went to start the fire. By the time I got back in, they were toasted. ;) There were a couple tablespoons of this to which I added about a tablespoon of black pepper corns and another of coriander. In order to fit these flats on the 18 WSM, I draped them over stainless steel bowls. (Cat will have to go hungry for a while.)

This cook is on the 18 WSM. I almost went with the 22 but the flats almost fit the 18" grates and I bought a little space by draping them. They will shrink a little and at that point I could remove the props so the flats lie flat. I fired the smoker with Stubbs briquettes with a large chunk of oak and a couple chunks of mesquite.

timetemp comment
10:45 AM
Dump lit coals on and close up the cooker
11:00220°Meat on!
11:33190°Opened one bottom vent full.
12:07205°
1:20 PM220°Set up ET-73 for remote temps
1:58235°/148°/245°
(grate/meat/lid)

2:57245°/156°/240°
3:25247°/158°/240°Removed SS bowls. Briskets a little firm but may settle to grate eventually.
4:07242°/163°/245°Pulled half of the top brisket to cook conventionally. (e.g. boil with cabbage and carrots. Maybe a potato.
4:54259°/164°/265°Closed single open bottom vent to about half
6:27238°/168°/235° Added carrots to the pot
7:10218°/166°/225Stirred toe coals, added cabbage to pot (about 7:00)
7:33240°/168°/230°Finished a plate of corned beef and cabbage and it was very good. Still a bit firm but not tough and gristly like the one I recently got at a restaurant.
9:00
Cooker cooling down so I took the meat off. It is done.

Fabulous! The corned beef and cabbage was good. The meat was a little firm when I had it so I took the cabbage out and let the meat cook another hour or so and it was much better. Flavor was a little bland but some horseradish and stone ground mustard turned that right around.

Next time I need to soak the briskets a little longer. They are bordering on a little too salty. These got about a 1 hour soak. Otherwise flavor was great!

Wednesday, February 12, 2014

Beef Neck Bones - Liver Dumpling Soup

We were at the Bavarian Lodge in Lisle (which I highly recommend, both for food and their selection of beer.) Cindy and I both had liver dumpling soup. While I found the dumpling itself a little on the firm side, it reminded me of a favorite dish from my youth. I resolved to give it a try at home. This recipe resonated with me so I started assembling ingredients. I picked up a package of neck bones yesterday (for $3.59/lb.) That evening I saw that neck bones were on sale at Valli for $1.99/lb. <sigh> I decided to employ dollar cost averaging and bought two more packages for a total of nearly 8 lb.

Weather has broken! Temperature was 22°F at the start of the cook and had dropped only 2 degrees by the time the meat came off. The sky was cloudy and wind light at less than 6 mph.

The first step was to smoke the neck bones. Yes, I had to figure out some way to get a Weber in the act. :D I recall that some recipes for beef stock start with roasting the bones to utilize the Maillard reaction to develop more flavor. In addition to that, I added some smoke to the mix. I rubbed the bones with Kosher salt and fresh ground black pepper before they went on the fire.


I used a drip pan (two actually) to catch drippings as well. The cook was done on the 26 to leverage the grate real estate to lay out 8 lb. of beef neck bones with an indirect fire. I used some left over lump in the mini-chimney to light some Stubbs briquettes behind the fire-brick wall. I was loath to wakl through 20" of snow to get to the shed so I grabbed a split of maple and another of oak for smoking wood. I alo threw in a chunk of what looked like apple.


timetemp comment
4:00 PM
Meat on!
5:10400°Thermometer is almost over the coals. Nevertheless, closed the top vent to about half.
5:30300°Meat off! Looks good! Trimmed a bit of meat off and it is tough but very tasty!

Results - A little of the meat trimmed from one bone was tough but tasted great! The smoked bones made a great stock with smoky overtones. I will do this again.


What to do differently next time: I could watch the fire a little more carefully but 400°F measured near the coals is not at all unreasonable for what I was doing. I just wanted to brown the bones before boiling.

I went on and boiled/simmered the bones that day and the next until the meat was falling off. After removing the bones, I added some carrots and celery since they were called for in the Liver Dumpling Soup recipe. The liver dumplings came out rather substantial. Very tasty but not exactly fall off the bone. I will try a different recipe next time (Mom's recipe acquired from little sister.) I will definitely make this again!


I could probably make them a little smaller too. ;)

Tuesday, January 28, 2014

Jerk Chicken

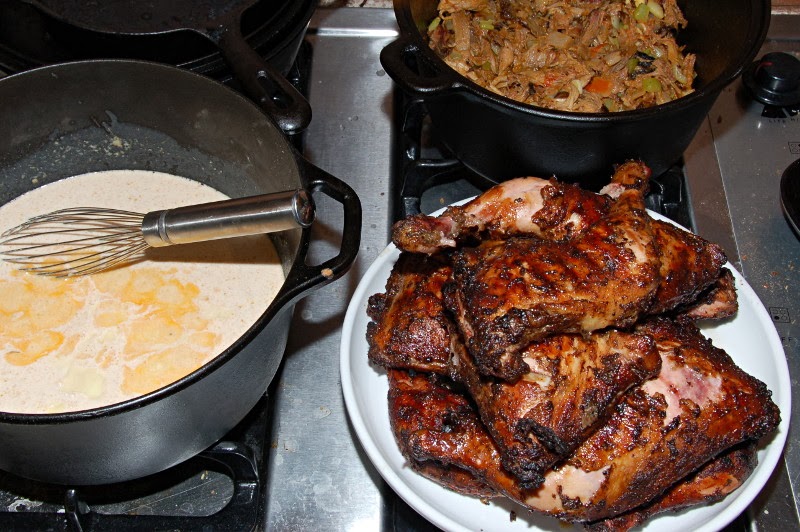
Someone else posted this at the WKC as a way to move past the cold weather. I picked up 7 lb of chicken leg quarters (on sale 59¢/lb!) and had everything else needed. Tonight I prepared the marinade using "Phrasty's REAL Jerk recipe. (Copied here.)

1°F, sunny and wind moderate at 10 mph. I'm using our new recyclable bin as a wind block.

For the rub I made a double recipe and made some substitutions.
8 green onions and a medium yellow onion. (Should have been 12 green onions.)
4 tsp allspice berries
2 tbsp fresh thyme (or as much as I dared trim from the plant on the window sill.)
4 tsp ground cinnamon
2 tsp grated nutmeg (~1/2 whole nutmeg grated.)
2 tsp brown sugar
3 tsp salt
2 tsp ground black pepper
1/2 C half and half rice vinegar and white vinegar (didn't have 1/4 cup malt vinegar.)
2 tbsp peanut oil
juice of two limes

I put the wet rub on the leg quarters about 10:00 PM the night before the cook. Total marinade time is about 17 hours. The plan is to cook indirect until nearly done and then crisp the skin over the coals.

I'll do this in the 26 kettle so I can spread the chicken parts out. Better to have more space than not enough. A couple fire brick ob edge will provide for indirect cooking. Stubb's briquettes will be providing fire. The fire is started - a chimney full - about 2:10 PM. I grabbed a couple chunks of what I believe to be apple for smoke flavor.

timetemp comment
2:35 PM°Poured lit briquettes out of the chimney and added the apple chunks. Temp went up pretty fast to about 350°F on the cooker. I'll let it settle a few minutes before putting the chicken parts on.
2:55425°Meat on! And no extra space on the grate. Good thing I went with the 26.
3:40450°Flipped the pieces over. They seem to be cooking pretty evenly across the the grate.
4:25325°Chicken probing at 150° and more. Time to add more briquettes and crisp the skin!
4:40350°Spread lit charcoal out and put chicken on it skin side down.
4:50
Meat off!

Results: chicken was delicious! I'll be doing this one again.


What to do differently next time. The only weak spot was that the skin still was not crispy. Tasty, but not crispy.

Monday, January 13, 2014

And now for something completely different

That's the theme of the most recent throwdown at BBQ Brethren. I've got some goat meat I picked up on sale that has been in the freezer for a while so I decided it was different. I cast about for recipes and finally decided that Mole Goat would be good. Having recently learned that the mole paste in the refrigerator is actually Adobo paste. Duh! I'd use that to season the goat.

Weather is right balmy with Temperature at 39°F and a bit of wind reported at 15 mph. Sky is presumed to be a bit cloudy (but the sun is down) and no rain is predicted.

The goat was sliced into 3/4" slabs after freezing and sold that way. I think it might be a goat leg. I thawed and drained it. The Adobo paste is pretty stiff so I mixed several tablespoons with enough water to make a loose paste that I then marinated the goat in for about two hours. My plan is to do the goat in the 14 WSM until it is well done and then put it in the smallest Dutch oven with some more adobo sauce to braise until it falls apart. Here I'm thinking of the treatment of Pepper Stout Beef.


As noted, this is going on the 14 WSM. To do something different, I put about a quart of hot water in the bowl. For charcoal I used some left over lump and briquettes with some fresh Stubbs briquettes in the small chimney to light things off. I had some hickory that hadn't completely burned away in my last cook and added a couple pieces of oak to that. Temperature is measured using the Maverick ET-732 (cooker probe only) and the lid thermometer. After closing up the cooker, I left one bottom vent open. At my first temperature check, I opened a second vent since temperature seemed to be lagging.

timetemp comment
6:20 PM
Meat on! (cooker still coming up to temperature.)
6:40191°/150°Opened a second bottom vent.
7:35225°/185°Meat probes about 150°.
8:16236°/195°Meat probed at 150-165°. the surface no longer holds puddles of meat juices so I put the meat in the Dutch oven.
9:45262°/210°DO lid temps at 210° and meat over 200°. Not yet falling apart so I'll let it go a little longer.
11:17282°/240°Done!

Results: The goat was tasty - reminded me of lamb but stronger flavor. It was just a little on the dry side and not terribly tender but not tough either. It made tasty tacos.


What to do differently next time: Not sure. I might look for a different recipe to try.

Wednesday, January 1, 2014

Stuff It!

Stuff it is the theme I chose for a BBQ Brethren throwdown. You win one and you get to choose the following theme. I won "That's a Wrap" and chose this. I decided to realize this theme with a stuffed tenderloin when I found whole tenderloins on sale for $1.99/lb.


The stuffing will be made from wild rice and mushrooms.

Weather was chilly at about 20°F with snow coming down. Wind was light.

I trimmed and split the meat.


I pounded it as flat as I could get it which was not very much.


The stuffing was made with rosemary, sage, cumin, pepper and crushed garlic. I added some bread crumbs (processed commercial stuffing) and a handful of dried cherries (which actually include cranberries and currants as well.) I mixed in a couple eggs to hold it together and some milk so it wasn't too dry. I didn't want it pulling moisture from the meat.


After spreading the stuffing on the meat, I rolled the whole assembly in parchment paper and stuck it in the car trunk (where it would be safe from neighborhood canines) to firm up for a couple hours. Then the task was to tie it up. On the outside I had to decide between a bacon wrap and a rub. I decided on a wet rub with crushed garlic, cumin, sage, black pepper and a little crushed red pepper in a peanut oil slurry.


The cook was done on the 26" kettle to handle the length of the roll. I used an indirect fire held back by a couple fire bricks. Fire was using some Royal Oak and Stubbs briquettes. I dropped a hickory stick on the lit coals to add some additional smoke flavor. The bottom vent was closed to about 1/3 open and the top to about 2/3. Part way through the cook the top was opened fully. This resulted in a temperature on the lid thermometer of about 350° measured half way between the fire and lid vent. (In other words, the lid vent was positioned opposite the coals when I remembered to do so.) I also wrapped a couple spuds in foil and put them over the coals until done. Here it is ready to come off.


timetemp comment
4:30°Closed up the cooker
4:40350° (lid)Meat on!
5:17400° (right over charcoal)Meat probes at about 70°.
6:00320° (opposite charcoal)Meat probes about 110°.
6:30350°/130° (lid/meat)
7:10350°/153°Meat off!

The meat and stuffing had good flavor. I could have used a few more cherries and a little less cumin. The pork was neither dry nor overly moist.


What to do differently next time: I can think of several things. First, I could slice the meat thinner doing a spiral butterfly rather than just one cut. I might also take it to a lower temperature. With the middle at 153° the pork was well past the required 140°. I could also cut the tenderloin in half and do two different treatments, trying out different fillings and/or bacon vs. wet rub.

Wednesday, December 25, 2013

Boxing Day Standing Rib Roast

We decided to do a standing rib roast for Christmas this year. Our plans are slightly constrained because we're heading into Chicago on Boxing Day to celebrate with our kids and we need to accommodate our grandson's sleep schedule. We also need to respect our daughter-in-law's need for rest and privacy as she is going to deliver our next grandchild any day now, so we have a 3 hour window this afternoon. Our plan is to arrive about 2:30-3:00 and stay until about 6:00. Most, if not all food is being prepared off site and I plan to finish the roast just in time to rest so it is ready to carve upon our arrival. I could probably hold it a little longer if needed but that seems unlikely as the meat did not hit the grill until almost 10:00

Weather is chilly at about 16°F and might hit 20° before the cook is complete. Wind is very light reported at about 3 mph and skies are cloudy. A few flakes of snow are falling.

The meat has been dry aged for a week now. Here it is fresh from the market.

Five days later it had darkened considerably. It darkened a little more in the next three days before the cook.


I rubbed this morning with cracked pepper and coriander and Kosher salt before I set up the cooker. I've placed a foil pan under the roast to capture any drippings. Here it is shortly after going on.


The cook is being done on the 18 WSM. I want to cook at about 225° and the smoker provides the tightest temperature control. Fire is using Royal Oak briquettes with a few chunks of oak and some hickory and mesquite for smoke flavor. When the meat hit a target temperature of about 120° I plan to move it to a hot 22" kettle for a reverse sear. The kettle was fired with a chimney of lump and held indirect using a firebrick standing on edge. Following the cook, the meat would be wrapped in foil and held in a preheated cooler for transport to our kids place where we were going to eat Christmas dinner. That would give it an extended rest.

timetemp comment
9:10
Close up the cooker with all vents wide open. Foiled the water pan and have a foil pan on the lower grate to capture any juices.
9:17 
Cooker temps about 180° and climbing so I'll close two bottom vents and leave the last about half open.
9:25
Meat probe laying on top grate at 201° and cooker temp reading 208° and these seem to be stable. Might have to open a bottom vent a bit.
9:30
Meat on! IT initially reading 41°F. I guess I could have gotten up earlier and let it come closer to room temperature.
9:4441°/212°/195° (meat/grate/lid)
10:0754°/252°/Need to close one of the bottom vents as temp is slowly climbing past where I want it.
11:2693°/223°/225°Super!
12:18111°/193°/210°Stirred the coals a bit. 
12:47120°/194°/194°Closed the cooker up while I got the kettle fired up with some Royal Oak lump.
12:58124°/181°/175°
1:00 
Transfer to 400° kettle to sear.
1:10124°Off!

The meat had a uniform rare appearance and tasted great! It might have had an over smoked flavor, but that was only a problem in the end pieces. It produced a lot of au jus while resting and unfortunately some of it escaped the foil and was in the bottom of the cooler. There was enough in the foil to serve with the beef. Before carving, I cut off the bones (4 ribs) and saved them for later. I did those for a couple hours the next day in the kettle. Those ribs were great!

No plated pix but here is the roast ready to come off the smoker. The top part pulled back a little away from the rib ends when I seared at high temperature.


What to do differently next time. I might go with a little less smoking wood.

Thursday, December 19, 2013

Couple more stuffed faties

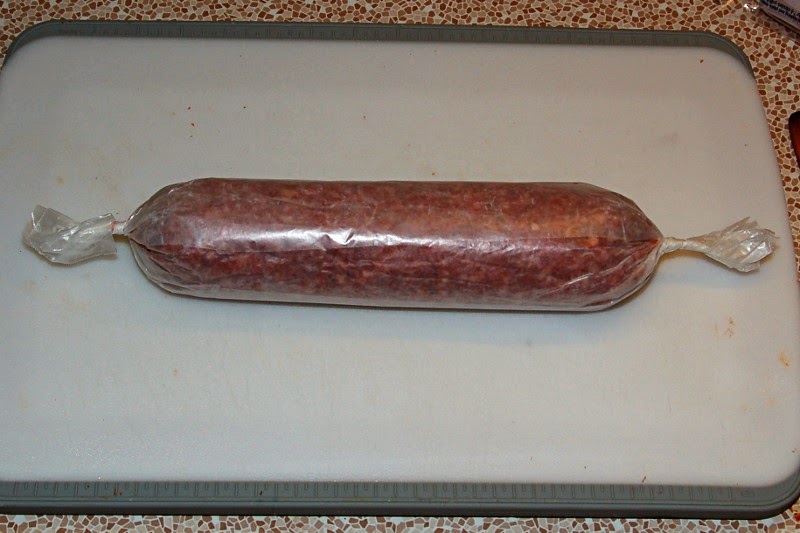
I had a roll of breakfast sausage in the fridge and needed to use it or freeze it. I decided it smarter to use it. :D And besides, we have finished the fatty I made a little while ago. I also had this package of ground beef in the refrigerator that I wanted to deal with. I decided to mix it with the sausage and wrap it around a roll of chorizo sausage with some sharp cheddar.


Weather was warm today with temps warm at about 39°F. Sky was cloudy and wind was light at just under 10 mph.

I started mixing the ground beef and breakfast sausage. There was enough for two fatties.


It spreads out on was paper pretty easily with a wood spatula moistened with warm water.


And then spread out some cheese and get the chorizo ready to roll.


This time I twisted the ends of the wax paper to see if that would seal them up.


These also roll out nicely with a second piece of wax paper and a rolling pin.


Both fatties went into the freezer to firm up a little while I prepared the bacon weave.


And ready to put on the fire. (Should have had a little more bacon.)


I cooked again on the 14 WSM (Weber Smokey Mountain). I fired it with some Royal Oak lump and a few pieces of hickory. Water pan was dry and foiled. I started with two bottom vents open and cut that back to one part way through the cook. I measured cooker and meat temperature using a Maverick ET-732. When the meat hit 155° internal temperature I cranked the heat up by removing the water pan and opening all bottom vents. I also stirred the charcoal a bit to knock the ash free. When the meat hit 170° I took it off to rest and put some zucchini on to grill.

timetemp comment
3:55°Close up the cooker and wait for the fire to settle. Two bottom vents wide open.
4:05245°/???°/???° (lid/meat/grate)Meat on!
4:40280°/115°/295°Went to one bottom vent open. I would like to go a little slower and allow more fat to render off.
5:20290°/158°/280°Pulled the foiled water pan out, stirred the coals and opened all vents to get some heat to see if I can crisp the bacon.
5:40335°/165°/367°
5:45335°/171°/363° Meat off and zucchini to go on.

These fatties are great! The spicy core blends with the wrapper and the cheese just adds another shade. I wish the bacon wrap would crisp but it tastes good nevertheless. Add some hickory smoke flavor to that and it is just fantastic!


What to do differently next time: Twisting the ends seem to have sealed the cheese in pretty well. the bacon still didn't crisp. Maybe next time fire up a separate kettle really hot to see if that does it. Maybe put the fatty on the bottom rack to get it closer to the coals.

Wednesday, December 11, 2013

That's a Wrap!

Flush with the win at the BBQ-Brethren "Spin to Win" throwdown, I'm preparing another entry. The current theme is "That's a Wrap!" I've done plenty of naked fatties - had some for dinner just last night - but I'm going to do something a little special for this one. I've seen some with the bulk sausage wrapped around another sausage and then the whole thing wrapped in a bacon weave. I'm starting with hot Italian sausage, some sharp cheddar and savory sage bulk sausage. I'll finish it off with a wrapping of bacon weave.


Weather is COLD with temperature at 17°F and wind a little over 10 mph.

Ingredients are listed above. I stuck the sausage and bacon in the freezer to harden them a little for easier handling. I then rolled the sausage out on a piece of parchment paper (ran out of wax paper) and then peeled the casing off the Italian sausage and set them approximately in the middle. I sliced some sharp cheddar and spread it on either side of the Italian sausage. Then I rolled the assembly up in parchment paper and stuck it back in the freezer to harden a little more. While that was going on, I separated my bacon and wove it on a piece of parchment. When that was done, I got the sausage assembly out of the freezer and rolled it up in the weave. That went back in the freezer while I got the fire started.

Components ready to roll

Everything goes better with bacon!

Bacon weave was built on parchment to facilitate assembly

Ends are loose - not sure what to do with them.

The cook will happen on the 14 WSM as it seems an ideal size. If it finishes before the fire goes out, I'll smoke some mixed nuts as well. I plan to see how hot the 14 will get by firing with a good supply of lump and leaving all vents wide open. I mixed a few pieces of hickory in with the lump to provide some additional smoke. As I type this (nearly an hour onto the cook) it seems that the cooker is not going to get too hot. It's been holding about 250°.

timetemp comment
12:50 PM
Closed up the cooker with lit coals. All vents open to see what it does. Got bacon I want to crisp.
12:58255°Meat on!
1:26250°Not as hot as I expected. But the bacon is cooking. Might need to finish in a kettle that I can get a little hotter. Added three Italian sausages. Might as well smoke them while I have the smoker running.
1:58250°Italian sausages look good and progress is evident on the fatty. I'll check Internal temperatures in 15 minutes.
2:25260°Sausages temp at 200° and fatty at 160°. Pulled the sausages and removed the foiled bowl to see if I could get some more heat on the fatty to crisp the bacon.
2:33290°We be crisping! Carefully turned the fatty over.
2:35290°And off


Now to prep the nuts.
2:55290°Nuts on
3:15210°Stirred and opened a second bottom vent.
3:35245°Stirred some more.
4:07265°Stirred probably one last time.
4:30235°Nuts off. Surprisingly the ones in the bottom rack were more done.


Just fits on a 14 WSM

Half hour in - added some sausages.

Ready to come off

Looking good - the sausages should have come off sooner though.


What to do differently next time: First I need to get the sausages off before they hit 200°. Next I'd want to get the fatty on high heat to crisp the bacon before it hits 160°. Lastly, I'd want to do something with the ends to keep the cheese in the fatty.  I could either trim the inner sausages so I can close the ends (or roll the bulk sausage out a little more. Perhaps tie some butcher string around the end. With regard to the nuts, it would be useful to swap trays from top to bottom grate for more even smoking.

Friday, December 6, 2013

Pepper Stout Beef and Turkey

Beef and Bell Peppers

Beef chuck roasts were on sale ($3.69/lb) so I picked up two for a little more than four pounds total. They're steaks about 2" thick rather than one big chunk-O-beef. Bell peppers were on sale as well so I picked up two meaty ones and some jalapeƱos. Already have some stout and garlic. Once again I'm following the Wolfe Pit recipe.

But wait! There's more! I'm also going to cook a 20 lb turkey provided by Alice Hanes for First Friday. I plan to do it on the rotisserie (hoping to learn from previous results.) I will time it to finish about the time we are ready to head out and then carve at the party. (Scroll past the PSB entry to find this one.)

Weather is chilly at 16°F with light clouds and wind light reported at 10 mph. We may not get any warmer through the day.

Beef was rubbed liberally with cracked black pepper and Kosher salt. The remaining flavors will go on in the Dutch oven.

This is being cooked on the 14" WSM (Weber Smokey Mountain.) This cooker seems to work best with lump charcoal so I used the remainder of a bag of Cowboy Lump and topped it up with some Royal Oak lump. I mixed in a few small chunks mesquite and hickory for flavor and made sure the wood and charcoal was fairly tightly packed for a better burn. I', starting with the three bottom vents about half open and will adjust as necessary. An ideal cooker temperature would be 275°-325°F. Temperature is measured using the ET-73 with the meat probe in the upper piece of meat and the cooker probe kind of wedged into the upper grate.

timetemp comment
10:00 AM°Beef on!
10:14215°/226°/73° (lid/grate/meat)
Still heating up.
10:52215°/226°/126°Seems low but the meat is moving so no changes will be made.
11:24285°/284°/142°Temperature came up w/out intervention.
12:19250°/262°/156°Opened the door and stirred the coals.
1:19225°/279°/163°Time to pot up with the pepper and stout. Unusual lid thermometer reading.
1:40210°/259°Time to open the bottom vents, stir the coals and let 'er rip!
2:20210°/259°
2:47205°/261°Need to bring in and finish in the oven.
5:00350° (Oven temperature)Uncovered beef - it is starting to fall apart.
6:00350° Covered, left in oven and oven turned off.

Results: Flavor great! It could have been cooked a wee bit more as the chunks took a little encouragement to break up. Flavor balance and heat were perfect.

What to do differently next time. Nothing, really.

Another rotisserie turkey!


(Same weather as above.)

The bird is injected so I'm not brining. I will rub with oil and stuff with fresh herbs and onion, orange, garlic and celery. I'll probably make some gravy too.

I'll set the rotisserie on my Performer and cook with lump charcoal. I'll probably go with apple an cherry for smoking wood though I'm thinking of adding a little mesquite and hickory as well. Temperature is via lid thermometer and a probe poked tenuously through the slot for the spit rod.

timetemp comment
2:20 PM
Bird on! Bottom vent about half open and top full. Temp is climbing fast! But that's supposed to be good for starting the bird so I'll let it ride.
2:45421°/280° (remote/lid)
3:30293°/170°Threw more lump, apple and cherry on the fire. Bird looking good!
4:20300°+-/170°No more remote reading. It was winding up around the spit. Good thing I checked it before it ran out of cable! I need a better way to do that, probably using a hole in the ring. I had the cooker open so I could put a thermometer in the thigh so I can measure meat temperature.
5:00
Coals almost gone and temp is dripping. Thigh probes at 165 and thigh at 157. Time to prepare to hold the bird. Threw a few more coals on.
5:30
Bird off and in the pre-warmed cooler.

Results: Turkey came out barely done. I suppose this is a good thing. The leg joints were just starting to loosen. The result was moist meat. And the stitching job held and contents of the body cavity remained in place. 

What to do differently next time: I need to work on the flavor profile. I have to plan some sort of further seasoning either under the skin or on it.

Thursday, November 28, 2013

Happy Thanksgiving!

We are celebrating with family and they have procured a 28 lb bird that is home raised. We're not sure about the breed but the shape looks a little different from the run of the mill store bought birds so it might be a heritage breed.

Weather is calm at 25°F with a light cloud cover. Wind is reported at about 12 mph but we're surrounded by trees and things at ground level are calm. Perfect weather for a cook!

This bird was not injected so we brined it for about 20 hours using:

  • 2 C pickling salt
  • 1 C sugar
  • 6 C apple juice
  • 2 C orange juice
  • 1 C lemon juice
  • 1 C lime juice
  • Sufficient water to bring volume up to 2 gallons.

After brining, the bird was rinsed about 15 minutes and spitted. With the spit in place I stuffed the cavities with:
  • 2 limes
  • one orange
  • 2 onions 
  • 6 cloves garlic
  • sprigs of thyme, sage and rosemary (all fresh from the garden.)
This time I took some little metal skewers and trussed up the openings so the fruit doesn't fall out as the bird rotates. I was also able to achieve fairly good balance so if the bird doesn't shift on the spit, we should get good rotation. Before putting the bird on, I spread the outside with oil. (Ordinary cooking oil - canola.)

Spitted and trussed and ready to spin!
I brought along my older Platinum (22.5 Weber kettle) on which to cook. This is fitted with my home made rotisserie ring. We're firing with Cowboy Lump and using chunks of cherry and apple for some smoke flavor. I'll be aiming for a little less than 300°F lid thermometer temperature as the last bird finished pretty fast.

Turkey on and cooker closed up.
I need to do a better job trussing these birds up. By an hour in, the leg end was loose and rolling on the spit and the stuff from the cavity was mostly in the drip pan.

About an hour into the cook.
timetemp comment
11:30
Lit lump dumped in the bowl on either side of a double drip pan and cooker closed up.
11:45350°Bird on! 
11:55300°Closed bottom just a bit more. No desire to rush this one. (Started cook with bottom vent about half open.)
12:38220°/282° (lid/spit)Added ET-732 probe to spit rod opening for second opinion temperature measurement. The lid therm is reading low!
2:50220°/282°While out running, temperature started dropping so son put more charcoal in and cleared the vents of ash. Temp seems back up. Probed meat and got about 155°, breast and thigh. Skin on back and legs is splitting so I brushed the bird with more canola oil.
4:28235°/300°
4:40???/300°180° breast and a little less thigh so it's off and resting.
(lid/spit) => Weber lid thermometer and Maverick ET-732 probe stuck in by the spit rod opening.

Turkey was tasty but dry. The information I saw that suggested I take it to 185° was bogus. Also this bird had no fat. None evident in the usual places and none in the drip pan.

What to do differently next time: Don't go to 180°! If I have one that's devoid of fat, I need to baste more and/or put some butter under the skin. An injection of butter might be good too.

Wednesday, November 13, 2013

Turkey Trial

For Turkey Day I'll be cooking a 28 pound bird. A little later for First Friday I'll be doing a 20 lb bird. I'm thinking of using my rotisserie for this so I will run a trial today using the cheapest frozen 12 pound bird I could pick up. (Jenny-O, $0.79/lb) I'll do it on the Performer using left over lump and some apple and cherry for smoking wood.

We're running 39°F under sunny skies with winds brisk at about 15 mph.

With the turkey ready I started fire building about 2:30 PM. That's piling the left over mostly lump into the chimney and getting it lit. I also split up some chunks of apple and cherry for smoking wood.

This smoke is being done on the Performer using the Rotisserie ring. The bird has been stuffed with sliced orange, onion, garlic and fresh rosemary, thyme and sage. Part way through the cook I moved the covered Silver A upwind of the Performer to afford some block from the wind. Didn't seem to make much difference.

timetemp comment
2:55 PM
Dumped lit lump out on either side of a drip pan and dropped a couple chunks of apple and cherry on the coals.
3:00
Rotisserie ring in place and spitted turkey rotating. Counter weight does not quite offset the eccentricity but helps I suppose.
3:22300° (lid)Temp seems to have settled here for now.
3:45305°Took pix and bird has lots of color! And the stuffing is falling out of it. :-/
4:20250°Probed 155° by thighs and 135° in breast. Was the breast still a little frozen when I started? Also added more lump and smoking wood.
4:40320°
4:50300°Breast probed 156° and thigh about 160°. Huh?
5:10300°Breast probing 167° and thigh at 166° - Done! Off and resting.
Cooker temps measured using the lid thermometer.

Bird about 45 minutes in.
Almost ready to take off the grill.
Partly carved
Turkey was very good! Skin was crisp and smoke flavor good. White meat ... was not dry. It's never going to be as moist as the dark meat which was very moist on this bird. Some of the stuff in the body cavity came out but the bird still tasted good.

What to do differently next time: I need to truss up the body cavity better so stuff doesn't fall out. Maybe leave an orange cut in half and run the spit through it to plug the opening. Maybe I could back off on the heat after the first half hour or so. It must have been pretty hot to finish a 12 pound turkey in 2:10.