Sunday, March 31, 2013

Standing Rib Roast for Easter

I've wanted to do a standing rib roast for a long time. We just never had an excuse to o that until now. It's a great main course for Easter and they're on sale. I got a 9 1/4 pound roast for $4.99/lb.


 It's a nice looking piece of meat with lots of marbling.


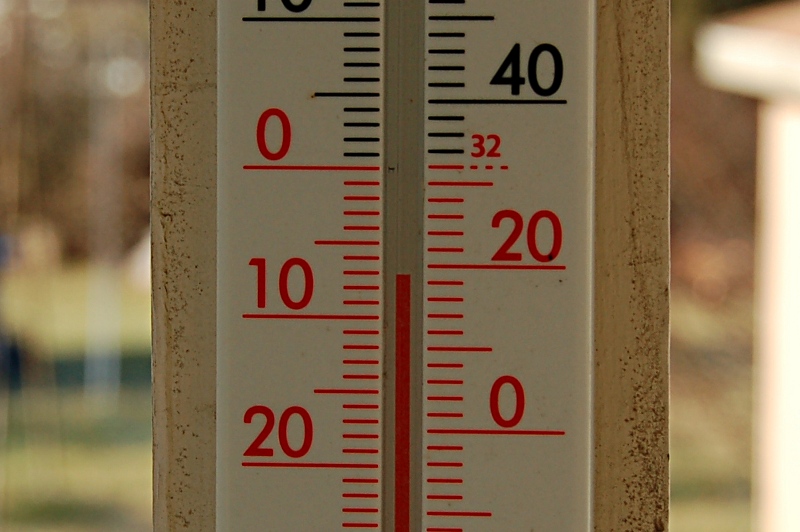
Weather is beautiful today with temps at about 45° at the beginning of the cook and hitting upper 50s midway through. Wind was brisk at first but mid-cook is stiff at 22mph with gusts to 28.

I wrapped the roast it in clean towels for about 3 days for 'dry aging.'  Rub will be simple consisting of salt, pepper and coriander. The plan is to slow cook at about 225° to an IT of about 118°. Then the meat will be rested while a kettle is fired up to 'nuclear' for a nice hot reverse sear.

The initial portion of the cook will be done on the 18.5 WSM (Weber Smokey Mountain.) Water pan will be foiled and left dry. I'm using the Royal Oak briquettes (the sort of dumbbell shaped ones.) I've got some oak with a little mesquite and black walnut for smoking woods. This was my second opportunity to use my new mini-chimney today. :D


timetemp comment
10:39AM
Lit chimney set on fire lay.
10:51
Lit chimney dumped on the coals and cooker closed up, top vent open and one bottom vent open.
11:05?/260°/?
(meat/grate/lid)
11:05 Closing bottom to about 50% of one vent.
11:17?/270°/230°Meat on! Closing the single bottom vent to about 25% and top vent to about 50%
11:2732°/244°/?Temp moderate and dropping slowly. Holding off on further adjustment for now. (Open top vent at 11:31)
11:5336°/239°/200°
1:17 PM75°/230°/200°
1:5391°/257°/220°Temps climbing as wind comes up. 18 mph with gusts to 25. Temperature is now 56°. Closed top vent to about 2/3.
2:16100°/246°/?Closed bottom vent to even smaller than before.
3:10117°/234°/?Meat off to rest!

(meat/grate/lid) => (ET-732 meat probe, ET-732 cooker probe, lid thermometer)

Here is the roast ready to rest.


After the rest, it went on a screaming hot grill to sear, but I did not keep it on there long as it caused grease fires almost immediately.

The roast came out very well for my first attempt. I sliced off the bones before carving it turned out to be pretty rare. It released almost no moisture while resting but did give up bright red juice while carving. I served end cuts for those who prefer their meat a little more cooked, I also offered to throw some on a hot cast iron pan to finish it a little more but no one took me up on the offer.

Flavor was terrific. Exposed surfaces had a pleasantly smoky flavor and the pepper, salt and coriander worked well with the meat.

Cindy made a fancy fruit salad to go with.


We also had (among other sides) grilled asparagus and Duchess potatoes.


I don't think I would do anything during the cook any differently. Instead of trying to sear on a kettle, I might try using the smoker and just firing it up as hot as I can get it. I think it would also make more sense to trim all of the fat that I can prior to dry aging.

Wednesday, March 27, 2013

Another run at Good Pizza™

And now for something entirely different. I've been working on pizza lately for a couple reasons. First, I like pizza. OK, one reason. I think I can make a healthy pizza too. I've been trying whole wheat dough for the crust. It's a bit of work, but I hope it will be worth the effort. For this batch I'm using a recipe I found at this blog. Unlike the previous recipe I tried, this one uses 100% whole wheat. I started it two days ago and took the two dough components out of the refrigerator at 11:00 AM.  The biga (with yeast) is on the right and even in the refrigerator it has risen.


At about 2:30 PM I combined them (using molasses instead of honey) and then let it rise for a while on a heating pad.


After turning it out, I cut it into four parts and spread one out on my 14 inch pizza peel (my new toy. :D ) The first pizza I made used pulled pork for meat and I added peppers, onions, mushrooms and several kinds of cheese. Before adding the toppings, I spread some EVOO infused with garlic on the dough. I'm not sure if that's the proper way to make a pizza but I like the garlic.


I had lit two full chimneys of lump charcoal in the Performer and preheated the firebrick in the oven to 250°F. The bed of coals spread pretty much across the entire charcoal grate. I threw a couple chunks of oak in for some smoking wood. I allowed some time to preheat the firebrick (while building the pizza) and then it went on the fire. I also tilt the lid a little to provide a gap of about 1/2" on one side. Without that the fire seems to starve for air.


Weather was warm (relatively) at 41°F with wind light at about 10 mph. the sky was overcast but bright.

Below are some time/temp milestones for this cook.

timetemp comment
4:15 PM420°/230°
(lid/brick)
pre-warmed firebrick on the hot grill
4:30430°/460°
4:35460°/600°Heating up fast!
4:37
First pie on!
4:41
Cheese melting and toppings curling.


First pie off! (Forgot to check time.)
4:58500°/685°Second pies on (on CI griddles.)


Second pies off!

(lid/brick) => (Performer lid thermometer / IR thermometer reading off the firebrick)

The first pie was slightly burned on the bottom. In fact, it left some charred material on the bricks. Yet the cheese had not yet browned. Toppings were cooked, but not quite to my liking. With the firebrick getting even hotter, I decided to use cast iron tortilla griddles for the next pies. I divided the next lump of dough in half again and built two pies using some smoked chicken. They cooked more evenly top to bottom. The only problem was that one cooked faster than the other and overcooked a bit. Fortunately one was just about perfect (and that's the word that Cindy used to describe it.)

The first pie looks OK on top, but the bottom is a little charred.


This one baked on the griddle was just right.


(It looks a little burned at the edge in the picture, but that is just how the whole wheat dough browns.)

If I'm going to use a peel, I really ought to get a second one. It would be nice to have one free to build the next pizza on before I remove the previous one from the grill. I'm not eager to move the assembled pizza (on raw dough) any more than absolutely necessary. The other thing I need to do is get the heat balance between top and bottom right. That means either more heat on the top or less on the bottom (firebrick.) One thing I might do is just continue to use the cast iron griddle. I can get a 14" CI pizza griddle (not Lodge, unfortunately) at Bed Bath & Beyond. I might also try modifying the arrangement of the firebrick and coals. I could leave one of the side bricks out and mound the fire toward that end of the cooker to put more heat over the platform and less on the platform itself. Of course that would result in less even heat and I would have to rotate the pie for more even cooking. I still have half the dough left so I'll have an opportunity to take another shot at this Friday.

Friday, March 15, 2013

Pastrami for St. Patrick's Day

With St. Patrick's Day a couple days away I thought it would be good to get a corned beef brisket and smoke it - commonly known as Pastrami (though it is not technically a Pastrami, it is close enough and darn good!) I'll be following the guidelines I found at Playing with Fire and Smoke and which come highly recommended. I started with a 4 lb brisket I found at Sam's and which happens to be the brand recommended in the blog. Today (Friday morning) it goes in a cold water soak so I can start leaching out the excess salt. The actual smoke will be done Sunday morning. I also bought a second brisket to use to make the more traditional corned beef and cabbage. We will be serving both.

Weather conditions - TBD

Preparation and recipes - per the link described above. First soak the brisket in cold water, changing several times. For smoking I will use the following rub.
  • 4 tablespoons freshly ground black pepper (more if you like it peppery)
  • 1 teaspoon ground coriander
  • 1 teaspoon granulated garlic powder
  • 1 teaspoon onion powder
  • 2 teaspoons Canadian/Montreal Steak seasoning
  • 1/2 teaspoon thyme, dried
  • 1 teaspoon paprika
and instead of Montreal Steak Seasoning, add:
  • dill
  • Cayenne flakes
(Montreal Steak Seasoning. <sigh> This is one of those things like Chili Powder that gets my undies in a bunch. It contains  garlic, coriander, black pepper, Cayenne pepper flakes, dill seed, and salt. Note that everything except Cayenne and dill is already in the recipe. Why not just list appropriate quantities of dill and Cayenne and be done with it! So I did.)

Pre-smoke prep

datetime comment
2013-03-1510:00 AMBrisket rinsed and put in cold water soak.

7:00 PMChanged soak water.
2013-03-167:00 AMChanged soak water.

4:00 PMChanged soak water.

10:15 PMDried off the brisket and applied the rub.
2013-03-178:20 AMIn crock pot with spices and 2 qt water. Crock Pot set to low.

3:20 PMAdded carrots, onion, celery and potatoes.

4:45 Not satisfied with progress. Put cabbage in a large pot and moved the rest of the stuff from the crock pot to the stove. 

5:25At light boil - Meat at 176° and still probing pretty firm.

6:00Meat ready to serve. Carrots still firm but cabbage a bit overcooked.


I plan to smoke this on the mini - perfect size for that. Looking at previous brisket smokes, I need to plan about 6 hours for this so I think I need to have it on the fire no later than 6:00 AM. Going to be an early morning! I'll use some of those new Royal a Oak briquettes and some pecan and oak for smoking wood, I think. Desired serve time is 5:00 PM. Allowing an hour for resting and 5 hours for smoking, I want to get it on the smoker at 11:00 AM.

Argh! Remote thermometer woes. The new ET-732 is reading all over the place on the cooker probe. The ET-73 is not receiving inside. I'm recharging some batteries for the 73 to see if that helps.yu

timetemp comment
11:10 AM
Meat on the smoker!
11:44232°/95°
(grate/meat)

12:13191°/124°meat moving so I'll leave it be for a while.
2:17192°/154°Still going OK. Threw another piece of oak on the coals which seem to be mostly gone. And the ET-732 seems to be reading the cooker OK. Lid temperature is now approaching the thermometers so I opened the bottom vents to 1/2 each (was one at 1/2)
3:00
Added some more briquettes
5:26255°/171°Should be done now. Still probing pretty firm. (Water pan now dry.)
6:00250°/172°Meat off to rest while boiled corned beef is sliced.
(grate,meat) => (ET-73 cooker probe, ET-732 meat probe)

Might as well document the plans for the other brisket. I bought two. The plan is to smoke one and to boil the other with cabbage, carrots following Alton Brown's recipe except that I'll be doing it in a crock pot. That should take about 9 hours so I need to get the brisket in at 8:00 AM. Veggies will go in about an hour before the meat is done.

Both briskets were taken to an internal temp of just above 170° and both really needed more cooking. They were both pretty firm. I sliced as thinly as I could but they were still too chewy. They were also a bit heavy on black pepper. The cabbage still wound up overcooked. Potatoes were also falling apart.

There is a lot of room for improvement on this one. I need to plan more time for the corned beef next time. Getting it to 170° was not sufficient. I will also back off on the pepper in the rub and boil. And I need to stage the veggies. Carrots first followed by potatoes and once the brisket is done, add the cabbage. 15 minutes extra for the corned beef is not going to matter while an extra hour for the cabbage leaves it pretty limp. I also need to check 

Thursday, February 21, 2013

Hang in there, Baby

There has been a lot of discussion of the Pit Barrel Cooker (PBC) on BBQ-Brethren lately. It's a medium size UDS (Ugly Drum Smoker) whose chief feature seems to be that the meat is normally hung above the bed of coals. Those who have cooked on both WSM and PBC have claimed that they prefer meat smoked on the PBC. I suspected that the chief difference is exposure to the coals in the PBC whereas that is blocked by the water bowl in the WSM. It may be that the conditions can be duplicated in the WSM simply by leaving the water bowl out. I decided to go a step further ang provide a means to support the hanging meat in the WSM. I bent some 3/8" rebar so it would fit under the lid and cut slots in the end that would engage the tabs that normally support the upper grate. The rebar was bent such that it was sprung against the tabs for some additional stability. I plan to make two pieces like this and notch them in the middle so they engage each other and provide some additional support. This apparatus provides about 7" of additional head space above the grate and is about 24" above the charcoal ring.


Today I stopped at Sam's and there were some baby baby backs nearing their sell by date marked down to $2.39/lb. I picked up a package to use to try out hanging ribs.


Weather was a typical late winter day with afternoon temperature about 27°F. Wind was reported above 15 mph but it felt more like a light breeze. The sky is cloudy with snow in the forecast.


I prepared a rub consisting of
  • 1/2 Tbsp Thyme (*)
  • 1 Tbsp Rosemary (*)
  • 1 Tbsp Oregano (*)
  • 1/2 Tsp Chili Chipotle powder
  • 1 Tsp ground Cumin
  • 1/2 Tbsp Ancho powder
  • 1/2 Tbsp Onion powder
  • 1/2 Tbsp whole Mustard (*)
  • 1 Tbsp Garlic granules (*)
  • 1 Tbsp Kosher Salt (*)
  • 1/4 C Brown Sugar (*)
(*) These went into the grinder. Maybe because I put the salt in there (quite by mistake) the mix came out pretty fine. I mixed with the remaining powdered ingredients and put directly on the meat.

The cook was in the 18.5 WSM and sans grates or water bowl. I used some stainless steel hooks to hang the ribs, inserting the hook between the 3rd and 4th rib at the slim end of the rack. I used KB briquettes (with some lump left from a previous smoke) and added pecan and apple for smoking wood. I lit about 3/4 chimney of charcoal rather than the few I would ordinarily use for the Minion method.


timetemp comment
5:00 PM
Lit coals on the fire and closed up Two bottom vents open. Within minutes the remote reads 275°. Going to one bottom vent open.
5:08293°/250°Meat on!
5:49289°/285°Moving along at a decent pace.
6:06295°/280°
7:22313°/260°Meat is pulling back on the bones. Need to check them in a little bit. When I checked, I found that one rack had separated, dropping about 2/3 of the rack onto the fire. I took that off to rest. The remainder of the racks did not pass the bend test.
8:22282°/260°Meat off! (except for the one that fell into the fire and which I put back on.)
8:40 291°/260°
8:50
Removed the last portion of a rack.

The ribs look good as they come off and prepare to rest.


They have a more roasted surface than what I have come to expect from the WSM. After resting there was moisture perling on the upper surface and the cut surfaces were very moist.


Flavor was really good. It did seem to lose the rub. I suppose it washes off with the fat and moisture that is rendered off the ribs as they cook. Based on this result, I will finish the apparatus (making a cross piece) and continue to try cooking without the water pan as appropriate. I may even try to fashion a similar support for my 22.5 WSM. Even the partial rack that fell into the fire came out surprisingly good.

Next time I need to provide backup support for the ribs so they don;t fall into the fire! I'm not sure what else I would do differently with the rub. I suppose I could try a coarser grind that might adhere better.

Friday, February 8, 2013

Sausage 'n Eggs

In the vernacular, I'm smoking a couple naked fatties. It started with 8 hard boiled eggs so I can make Raichlen's Smoked Egg Salad. Not wanting to fire up the smoker - even the mini - for only four eggs, I'm doubling the recipe. And besides, SWMBO likes HB eggs so I think she'll like this. Even eight eggs leaves plenty of room on the cooker so I ran out to the store and got a couple of tubes of breakfast sausage to smoke as well.


Weather is chilly at 26° F with wind moderate, reported at 15 mph (but not really noticeable.) The sky has a light overcast. Overall, not a bad day to smoke (once I get the smoker thawed out. ;) )

I boiled the eggs last night using Alton Brown's strategy (start in cold water, bring to boil, cover for 15 minutes and then chill to stop cooking.) They peeled fairly easily. The fatties took no more prep than removing the plastic packaging.

I'm cooking this in the mini on the top grate only. I'm using a new stainless water bowl for the first time. The old one developed some holes again. I bought one listed as "heavy duty" on the Amazon web site. We'll see how it lasts. I'm using briquettes left over form a previous smoke (an undocumented smoke of some moinks.) I used some apple wood for smoke wood. I stuck the meat probe from the ET-732 in a fattie and I'll use it to monitor cooker temp as well. Eggs will come out based on color,

timetemp comment
11:00 AN
Sausage and eggs on!
11:26101°/212°/200°
meat/grate/lid
Eggs golden - they're off!
11:44138°/214°/?
12:18160°/214°/?Ready to come off? No! bleeding all over the plate so I put them back on.
12:50156°/219°/?Meat still recovering from coming off the grill for a couple minutes.
1:09169°/225°/This time meat is not bleeding as it rests.


The eggs had a nice tan color that permeated about 1/8" into the egg. The egg salad was really simple and the smoky flavor cane through nicely. It was not subtle nor was it overbearing. Apple is the wood to use for hard boiled eggs!


Sausage took on a nice color and had a good smoke ring.


They did not seem to shrink as much as I would have expected. I suppose they still have most of their fat. Flavor was very good with a nice smoke flavor. Apple was good but almost too subtle for the highly seasoned sausage. So far I've only tasted one (likely the sage) but I'm sure the other will be just as good.

The only thing to consider doing differently might be to add some hickory for the pork. I'm not sure I'd like to do that for the eggs.

Tuesday, January 15, 2013

The Big One - Inaugural Smoke


I was lucky to add a 22½ inch Weber Smokey Mountain to my collection. Ever since I've been dying to fire it up. With an adequate supply of pulled pork, ribs and brisket in the freezer I cannot justify smoking any of those. What I need is some fowl! (OK, I smoked a couple chickens in the mini not two weeks ago, but that will not last that long!) Jewel had BOGO sale on chicken including Perdue roasters. Not cheap at $1.99/lb but at half price I felt they were reasonable for their size. I picked up four eight pound chickens - the largest I could find. Instead of getting eight chickens, I got a twenty pound Butterball turkey to go on the other grate.

Weather is C-O-L-D - probably the coldest day so far this winter. It was 10° F when I got up and almost 20° when the turkey went on. Wind is nil reported at 6 mph.


The turkey is a frozen Butterball so it is already injected - no need to brine. I put it in a cooler in a water bath to hasten thawing. The chickens on the other hand have "at most three percent retained water." (I guess that's water they manage to seal in the cryovac bag to bump the weight by three percent.) The chickens get a brine consisting of:
  • 2 C pickling salt
  • 1 C sugar 
  • 6 C apple juice
  • 2 C orange juice
  • 1 C lemon juice
  • 1 C lime juice
  • Sufficient water to bring volume up to 2 gallons.
The chickens were put in a Reynold's turkey size oven bag in a 5 gallon plastic bucket and the brine poured over them. This was all a perfect fit in that the oven bag is a perfect size to line a 5 gallon bucket, the chickens just barely fit inside the bag in the bucket and the brine came about ½ inch below the top edge of the bucket. (I guess I have just over 3 gallons of chicken by displacement.) The bucket was put with the turkey in the basement where the temperature is about freezing. Chickens went into the brine about 11:00 PM and will brine over night. Before they go on the cooker, I stuffed some orange rinds, onions and rosemary and sage into the body cavities of the birds.


These will be cooked on my new (to me) 22½ inch WSM. The turkey will go on the bottom rack since it is expected to take longer while the four chickens will go on top. I plan to use a dry water bowl lined with foil. There is no benefit to holding low temperature with fowl. This will give me a chance to see what temperatures are typical in the larger WSM. I will fire with Kingsford Blue and add some apple, cherry, mesquite and a little hickory for smoke. I will use the Minion method to light the charcoal so I won't get the raging 500º start that I get with two lit chimneys on the 26 inch kettle. This will be more a smoke than a roast. Update on the fire prep. I was not able to use the igniter on my Performer. Also I had to abandon mesquite smoke as the mesquite chinks were in the bin on the Performer. After I closed the smoker up, I left two bottom vents wide open and a third closed. That produces a pretty reasonable temperature for fowl.

Update on plans... The coating of ice on the performer prevented access to the storage bin on my Performer and that is where the mesquite is. No mesquite. I used apple, cherry and hickory for smoking wood.


As it turned out that four eight pound chickens will not fit on a 22½ inch grate. The turkey fit fine.


But even three chickens were a little tight.


So I quickly set up the mini to handle the overflow.


Here is the temperature profile and notes for the cook in the 22½ inch WSM.

timetemp comment
11:15AM°Turkey on the smoker!
11:40
Three of four chickens on! That's all that fits. I'm quickly firing up the mini to handle the fourth. Before opening the cooker to put these chickens on I noted that the bottom grate was already over 300°
12:0388°/311°/62°/271°/? (trk/bgr/chk/tgr/lid)
12:1091°/315°/71°/273°/245/?
1:30 PM142°/340°/126°/285°/?
2:04154°/327°/142°/276°/250°Could the turkey finish before the chickens? Or do I have the probe in not the best spot - maybe not a good reading.
2:30162°/315°/151°/270°/240°Opened cooker and checked turkey with WW and got ~140°. I tried to relocate the probe but now getting an even higher reading. I'll trust that the turkey will not be overcooked when the chickens are done.
3:10171/273º/163º/256º/Chicken off!
3:24172º/?/-/-/250ºTurkey probes at 151º deep in the breast. Relocated the ET-732 probe to that location.
4:03162/282/-/-/?Turkey coming off!

Temperature readings are (trk/bgr/chk/tgr/lid) => (turkey breast/bottom grate/chicken/top grate/lid) Turkey and bottom grate are via Maverick ET-732 while top grate and chicken are via old reliable ET-73. The lid is the factory installed thermometer in the cooker.

The following time/temperature record is for a single chicken in the mini-WSM. All electronics are in use on the 22½ WSM so this will be monitored via the lit thermometer and near finish, using the Taylor Weekend Warrior quick reading hand held.

The fire is prepared using briquettes and I'm using some pecan for smoke wood. All vents are wide open as this seems to produce a pretty good temperature for smoke-roasting fowl.

timetemp comment
12:10225°Bird on!
2:11300°/136°Closed bottom vent to about half. Going a little faster than I wanted.
2:30 260°/142°Better.
3:14260/160Bird off!

This is what the birds looked like when I checked turkey temperature.


The birds picked up even more color before they were done.


All of the birds were great - flavorful and moist. None of the temperature indicators popped. The chickens were a tad salty. Next time I brine that long, I should rinse for about 15 minutes to leach out some excess salt. The stuff in the body cavity smelled great but I'm not sure how much it contributed to the flavor. The smoke flavor on the turkey was subtle. I wonder if a slower smoke would make a difference. I pulled the chicken and turkey and have a lot to freeze as well as lots of bones and skins to make a nice stock.

Soak the brined birds for about 15 minutes to leach excess salt.
Try shoving herbs under the skin instead of the body cavity.
Maybe cook at a lower temp for more smoke flavor. But it's hard to fault these birds. Maybe only for a turkey.

Friday, January 4, 2013

Chickens - first smoke of the new year

I had hoped to fill the 22.5 Weber Smokey Mountain (WSM) with chickens for it's inaugural smoke. Unfortunately the grocers have not cooperated. The best price I can find for whole chickens is 89¢/lb and they were small at about 4 lb. I went with a pair of birds from Sam's Club at 99¢/lb and about 6½ lb. What I didn't realize was that they were so called enhanced birds. As I rinsed the birds prior to brining, I noticed the skin over the breast peppered with little holes. I looked carefully at the cryovac the birds were packed in and saw they were enhanced with up to 12% "natural broth." Ugh! I had already prepared the brine so I went ahead and put the birds in. They will be double brined I suppose.


OK, here's my gripe with Sam's Club. These are cryovaced birds packed two to a bag and then weighed and labeled. On the left is Sam's Club sticker. Note at the top it states "TWIN WHOLE CHICKENS 1009% NATURAL" You would think that means no 'enhancement'. You (and I) would be wrong. The inner packate states "Flavor and Tenderness enhanced with up to 12% Natural* Chicken Broth" On the other side the broth incredients include (in addition to chicken broth) 2% or less of Sea Salt and carageenan. Sea salt and carrageenan do not naturally occur in chicken! I really need to start reading these labels a lot more carefully. So... 1/8 of my chicken is salt water that probably had some chicken bones (and other 'parts') waved over the pot.

Weather at start is 35° and sunny with wind brisk at 17 mph. (I'm using the covered gasser as a wind block.) Near finish temperature has dropped to 31° and wind is down to about 14 mph.

I made a gallon of brine using water, a ping of apple juice, juice from two lemons, juice from 5 desiccated limes (I hesitate to use the term 'fresh' as the skins were like leather.) Added to this is a cup of pickling salt and ½ cup sugar. Birds went into the brine about 11:30 AM and came out about 3:30 PM. I didn't do any more seasoning of the birds preferring to rely on the smoke for flavor.

This is going on the mini-WSM. I used mostly Grove Lump and a little blue bag briquettes. For smoking wood I chose apple, cherry and a little mesquite. It turned out that there was insufficient clearance for the chicken under the lid so I split the bird on the top rack.

I'm using my ET-732 for the first time on this cook. I'm also not working at controlling temperature. Both top and bottom vents are wide open and there is no water in the bowl. After closing the cooker the temperature spiked at about 360° and has settled to about 330° a couple minutes later. It still seems to be dropping.


timetemp comment
3:40 PM
Birds on!
4:00 66°/324°
(meat/cooker)

4:47138°/349°Moving right along...
5:38158°/322°Almost done.
5:53162°/318°Cooker seems to be dropping faster than the bird is gaining. I'll stir the fire a bit. (There were still plenty of coals.) The skin on the leg on the split bird was just starting to pull back so I'll give it a couple more minutes and call it done.
6:03163°/302°Time for the split bird to come off. I'll move he meat probe to the whole bird.
6:21162°/331°
6:36167°/349°Bird done and off.


The birds came out good. Skin was not crisp but far from the rubbery texture that a low 'n slow produces with fowl. It was noticeably salty but not unpleasantly so. It took on a light amber color and pleasant smoky flavor.


Next time read the labels more carefully! also consider dropping the top grate an inch or so to provide additional head space under the lid. The relatively high heat cook seems to be fine for the bird. I didn't really see deficit compared to slowing the cook down.